Introduction
The scale tool is often underutilized by Figma users. Indeed, it came with some drawbacks, such as manual resizing, for example. For those who used Sketch before succumbing to Figma's many advantages, the scale tool must have seemed underutilized or not fully exploited. This is notably why there are many plugins available through Figma Community.
We had indeed seen the capabilities of one of them, namely the Scale plugin, which lives up to its name. This allowed us to have some additional features on the scale part natively present in Figma. You will soon be able to remove this plugin, as Figma has just updated the scale tool.
Scale Tool
USE THE TOOL
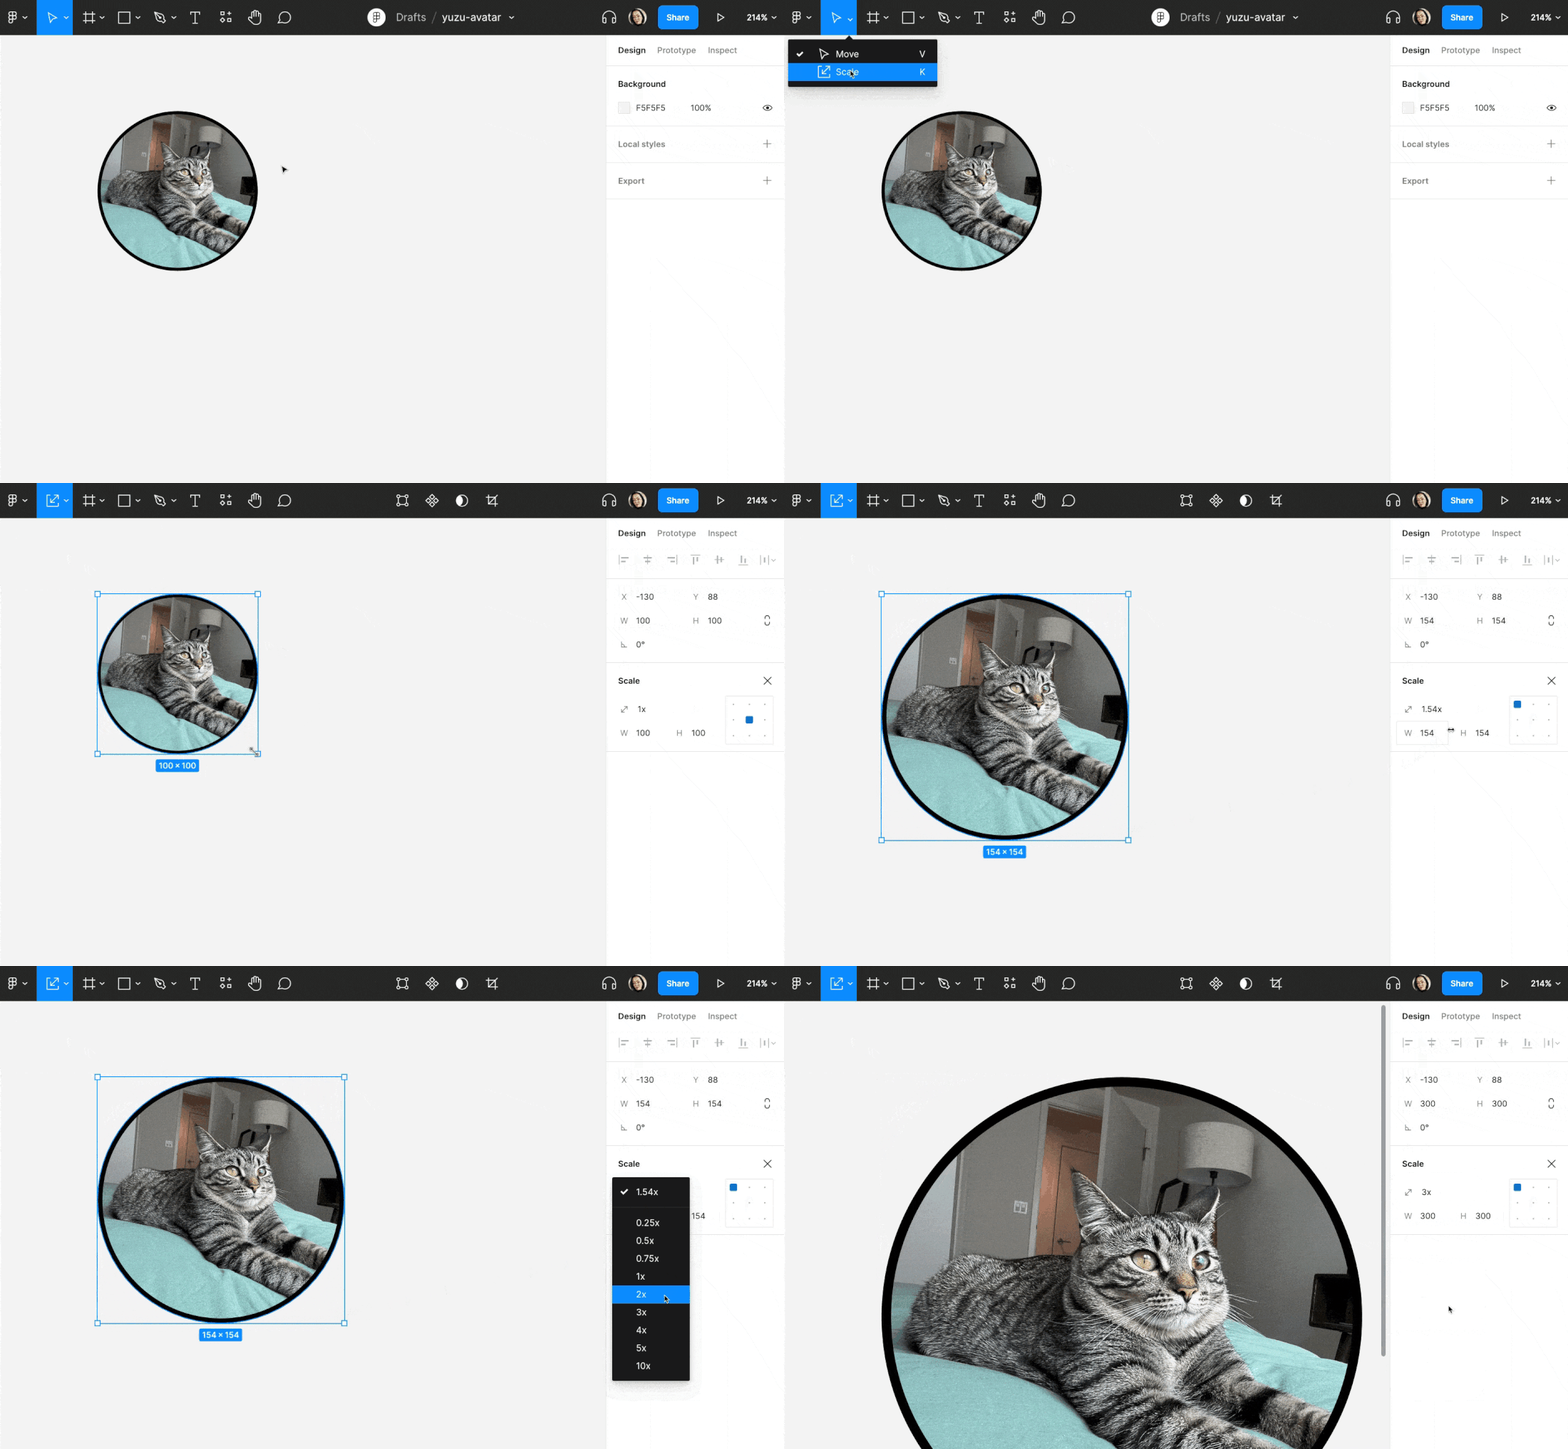
- Activate the scale tool by pressing the K key on your keyboard, or by clicking in the toolbar and selecting Scale.
- Select an object.
- Resize the object.
RESIZE
- Click and drag: Hover over the edges of the bounding box to reveal the resize cursor. Then click and drag your mouse to resize the object.
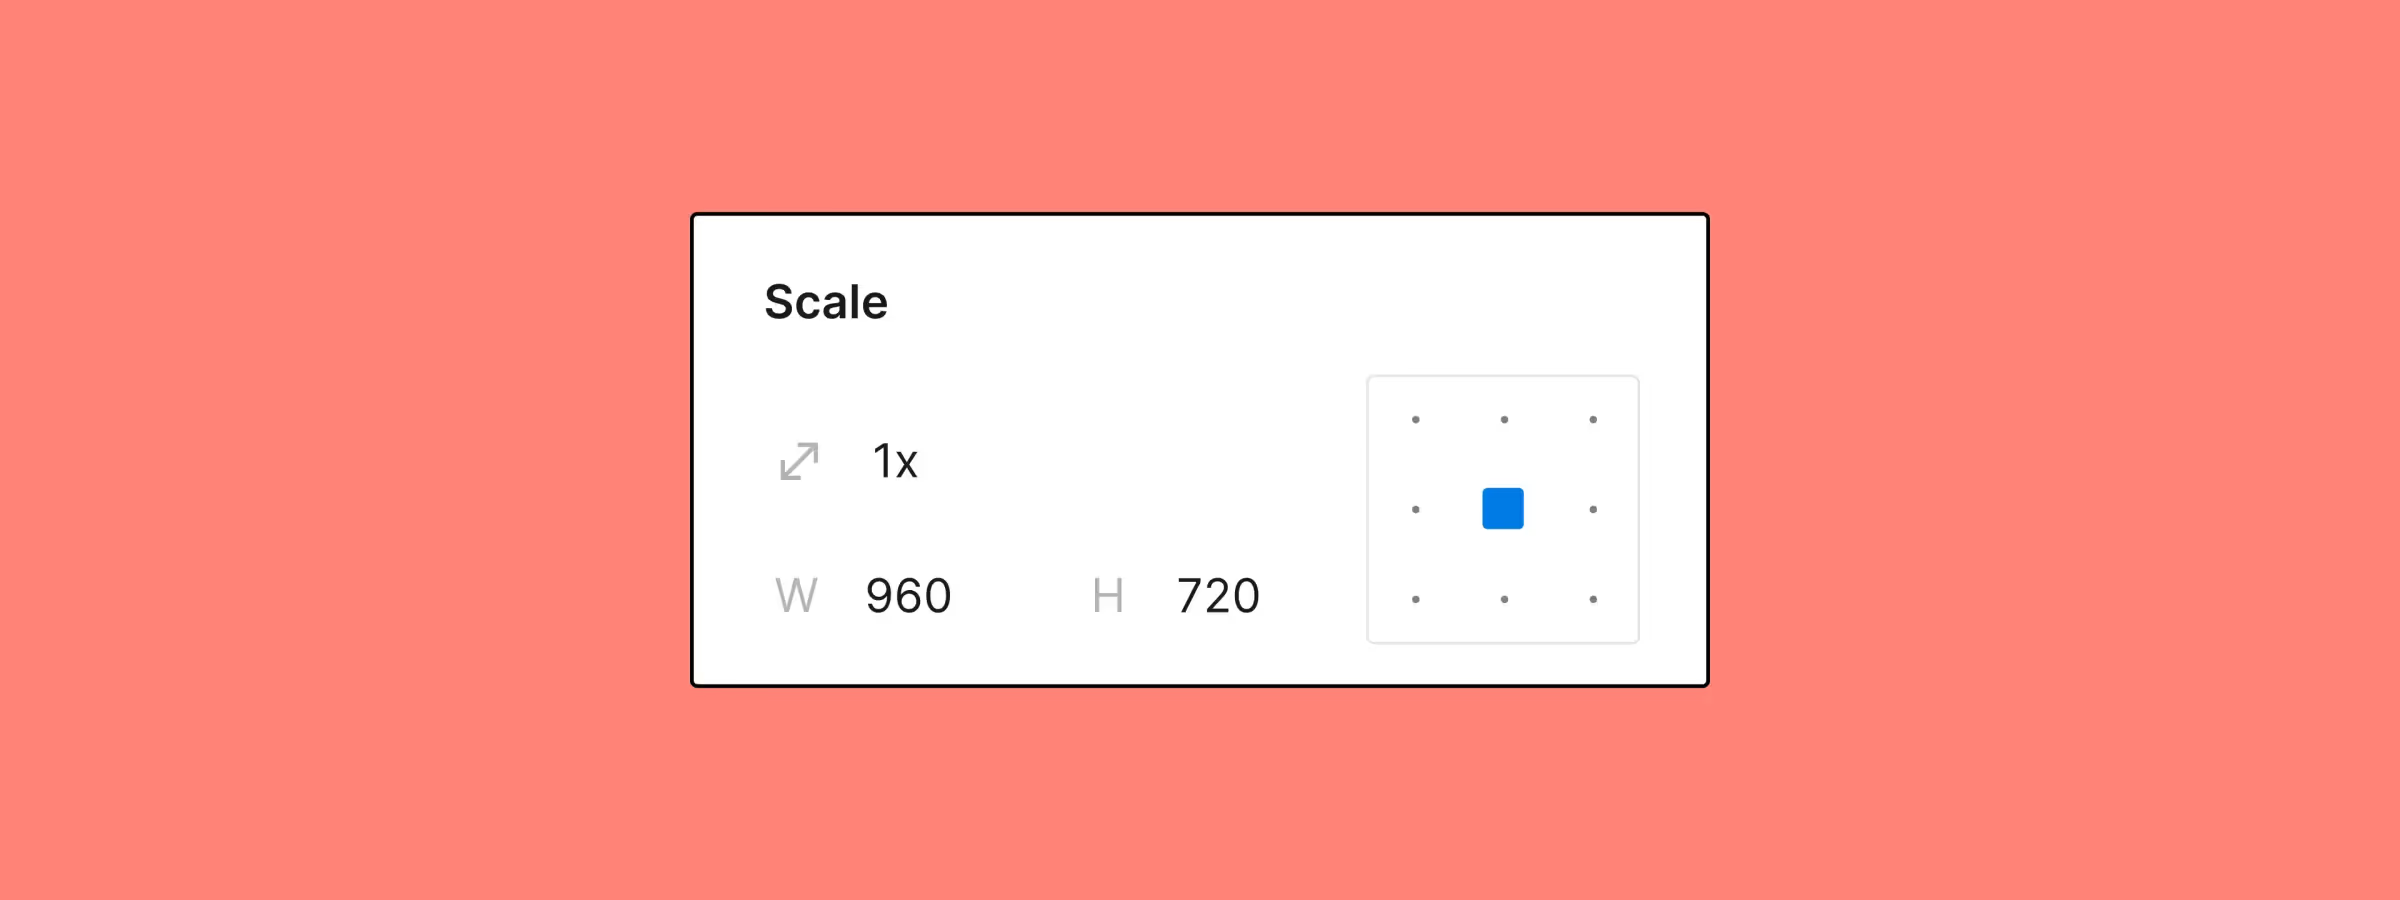
- Scale Multiplier: To use the scale multiplier, open the dropdown list and select a multiplier. You can also type a multiplier directly in the text field and press Enter/Return to apply it.
- Dimension fields: Use the width or height fields by typing a number in either one and press Enter/Return to apply the value. For reference, the other field will be automatically updated.
SET THE SCALING DIRECTION
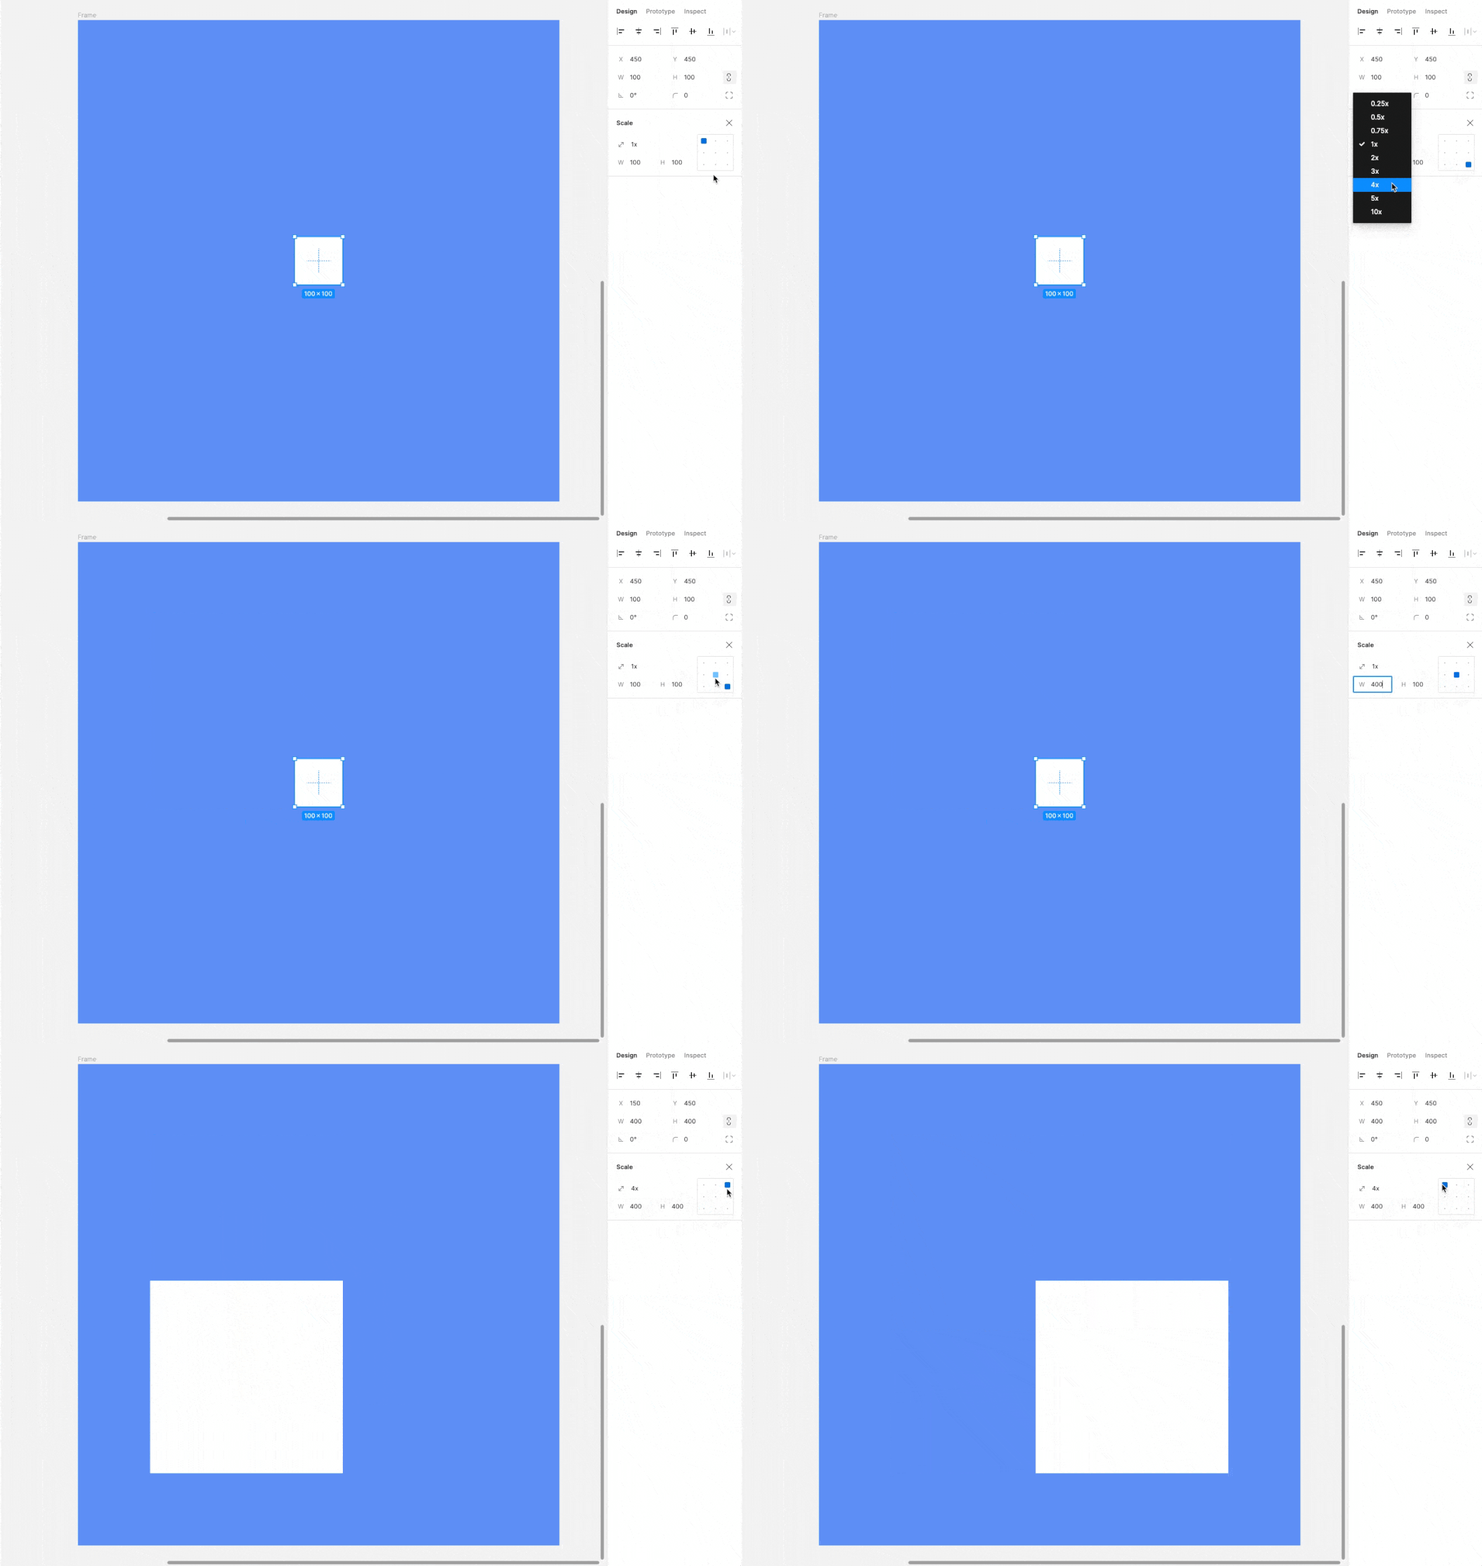
In this update, there is a new area that represents the object's anchor point in relation to its future resizing. This area follows the same principle as the one present in the auto layout function. By using the anchor point to define the object's anchor point, you indicate to Figma which side of the object should remain in place.
When you scale an object, you do it in the opposite direction relative to the anchor point. For example, if the anchor point is placed at the center, the center of the object remains in place and is resized in all directions. If you place the anchor point in the top-left, the object will be resized downward and to the right.
CHANGE AN OBJECT'S SCALING DIRECTION
- Activate the scale tool (K).
- Select the object.
- Click on one of the anchor points in the anchor area.
- Use the scale multiplier or dimension fields to scale the object.
Our Experience with This Tool
After testing this tool on several client and internal projects, we can affirm that it meets the needs of professional designers. Our team uses it regularly in its daily workflow, which allows us, based on our experience, to validate its effectiveness in real production conditions.
Points tested in detail:
- Performance on large files (500+ frames)
- Compatibility with complex design systems
- Stability during intensive use
- Integration into team workflow
Points of Attention (Tested in Real Conditions)
In the interest of transparency, here are the limitations we identified during our testing:
- Processing time that can be extended on very large files
- Requires a stable internet connection for certain features
- Learning curve for beginner users
Conclusion
For those who are new to Figma with this version of the scale tool, you will be able to use it better. But more importantly, it allows those who were frustrated by the old version to no longer rely on third-party plugins. If you have gotten into the habit of using a plugin to perform your resizing with precision, you will definitely find in this update what you need so that eventually you no longer have to use a plugin.
If you still wish to use a plugin, I strongly recommend discovering the Scale plugin.
In conclusion, Figma once again brings a small improvement to its software so that each feature can be fully utilized, and resizing is part of it.